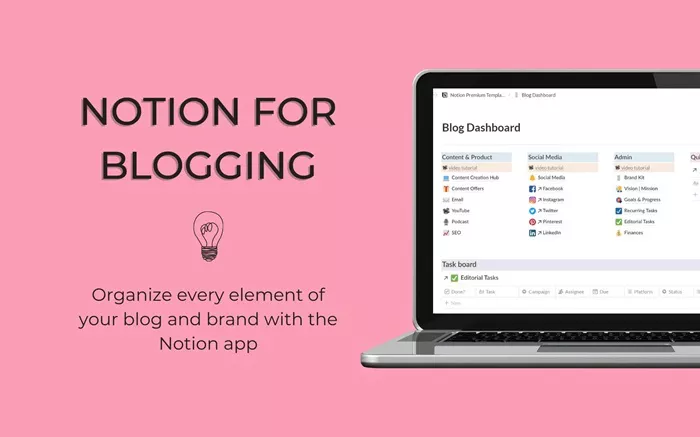
Notion has rapidly become a favored tool among productivity enthusiasts, entrepreneurs, and content creators due to its flexibility and customizable features. For bloggers, it offers a streamlined way to plan, organize, and even publish content. This guide walks through how to leverage Notion for blogging, providing practical steps and best practices to enhance your content creation process.
Why Use Notion for Blogging?
Notion is more than just a note-taking app; it’s an all-in-one workspace that allows you to manage projects, collaborate with others, and organize ideas efficiently. For bloggers, it acts as a central hub to:
- Draft and edit blog posts.
- Organize editorial calendars.
- Track blog performance and analytics.
- Manage resources like links, images, and research.
- Collaborate with team members or guest writers.
Its versatility allows users to adapt it to their unique workflows without needing to switch between multiple tools.
Setting Up Your Workspace for Blogging
The first step in using Notion for blogging is setting up your workspace. Here’s a step-by-step guide:
Create a New Page: Open Notion and create a blank page dedicated to your blogging tasks. Name it something intuitive, like “Blog Hub” or “Content Dashboard.”
Choose a Template: Notion provides pre-made templates for content planning and project management. You can choose a blogging template or create one from scratch to suit your specific needs.
- Set Up Key Sections: Organize your page by creating sections such as:
- Editorial Calendar: Use a calendar view to plan and schedule posts.
- Blog Ideas: Create a table or list to store potential topics.
- Drafts: Add a section for incomplete posts or outlines.
- Published Posts: Track published articles and include links to them.
Use Databases for Organization: Notion’s database feature allows you to structure your content efficiently. Create properties like tags, categories, publication status, and deadlines for each blog post.
Planning Your Blog Posts
Proper planning is essential for consistent and quality content. Notion excels at helping you map out your ideas effectively.
Brainstorming Ideas: Use the “Blog Ideas” section to jot down topics as they come to mind. Add columns to categorize ideas by niche or priority.
Research Notes: Create sub-pages for detailed research on each topic. This helps keep your notes organized and accessible.
Content Outlines: Start a new page for each blog post and use bullet points or headings to outline the structure before you begin drafting.
Drafting and Editing Content in Notion
Drafting your posts directly in Notion can simplify the writing process:
Rich Text Editing: Use Notion’s formatting tools to write and style your content. Features like headings, bullet points, and text highlights make it easy to format your posts as you draft.
Version Control: Duplicate pages to create different versions of your draft, ensuring you can track changes or revert to earlier drafts if needed.
Comments and Feedback: If you collaborate with others, they can add comments or suggestions directly on the page.
Managing an Editorial Calendar
Consistency is key to successful blogging. Notion’s calendar view allows you to plan your content schedule effectively.
Create a Calendar Database: Add a database to your workspace and set it to display in a calendar format.
Add Properties: Include fields such as blog title, status (e.g., “Draft,” “Editing,” “Published”), and deadlines.
Color Coding: Use tags or labels to differentiate between categories or types of content.
Tracking Blog Performance
While Notion doesn’t have built-in analytics, you can track your blog’s performance manually:
Performance Log: Create a table to log metrics such as views, shares, and comments for each post.
Visual Dashboards: Use charts or tables to visualize trends and assess what type of content performs best.
Goals Section: Set monthly or quarterly goals for metrics like traffic or post frequency and track your progress.
Managing Resources and Media
Notion can act as a repository for all your blogging assets:
Image Storage: Upload visuals, diagrams, or infographics directly to Notion or link to cloud storage platforms.
Content Resources: Save links to articles, videos, or tools relevant to your blog topics.
Affiliate Links and Partnerships: Create a separate database to track affiliate partnerships, links, and commissions.
Collaborating With a Team
If you work with guest writers, editors, or a blogging team, Notion makes collaboration seamless:
Shared Workspaces: Share specific pages with team members and set permissions (e.g., view-only or full editing access).
Task Assignments: Use checkboxes or assigned fields to delegate tasks like editing, graphics creation, or social media promotion.
Communication: Use the comments feature to discuss specific points within the draft or calendar.
Exporting Content for Publication
Once your blog post is ready, you can export it for publication:
Copy and Paste: Copy your content from Notion and paste it directly into your blog platform. Notion’s formatting is compatible with most editors.
Export Files: Save your posts as PDFs or Markdown files if needed.
Embed Links: If you prefer, link directly to your Notion page instead of exporting content.
Tips for Maximizing Efficiency in Notion
Utilize Templates: Save frequently used layouts as templates to save time.
Keyboard Shortcuts: Learn Notion’s shortcuts to navigate and edit faster.
Integrations: Connect Notion with other tools like Zapier or Google Calendar for additional functionality.
Conclusion
Notion is an invaluable tool for bloggers seeking a streamlined and efficient way to manage their content creation process. From planning and drafting to publishing and performance tracking, it serves as an all-in-one solution tailored to your workflow. By implementing the strategies and structures outlined above, you can elevate your blogging game and focus on what truly matters—creating exceptional content for your audience.
Related Topics

